

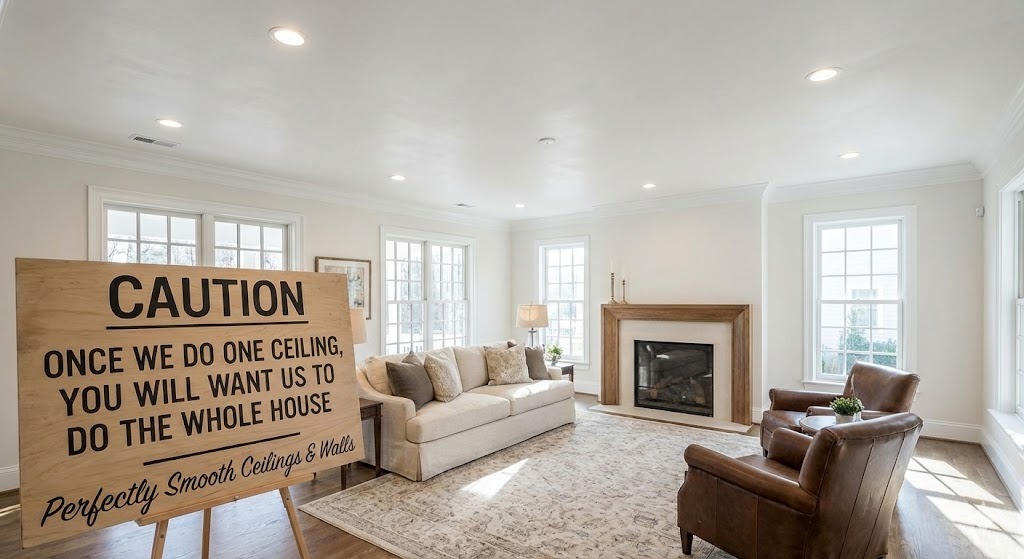


Popcorn Ceiling Removal in Massachusetts
A Popcorn Ceiling, sometimes called an acoustic ceiling, is a sprayed-on ceiling texture designed to hide drywall seams and reduce visible imperfections. Many Springfield, Massachusetts homeowners replace popcorn texture with a smooth finish or modern ceiling texture because the surface traps dust, complicates repainting, and dates interior design.
Popcorn ceiling removal and popcorn ceiling repair require controlled preparation, the right tools, and a refinishing plan that delivers a clean ceiling surface without sanding dust in living spaces. Professional textured ceiling removal focuses on containment, surface protection, scraping popcorn ceiling texture safely, and restoring the ceiling to a paint-ready finish.
What is a popcorn ceiling and why did builders use popcorn texture?
A popcorn ceiling is a ceiling texture made by spraying a mixture that creates raised “peaks” and “kernels” across drywall or plaster. Builders used popcorn texture because the material hides uneven seams, reduces the appearance of nail pops, and speeds up interior finishing in large developments. Many properties across the Pioneer Valley still have popcorn ceilings in bedrooms, hallways, and finished basements.
Benefits of removing popcorn ceiling in Springfield homes
Benefits of removing popcorn ceiling show up in appearance, maintenance, and lighting performance.
Cleaner ceiling maintenance: A smooth ceiling reduces dust retention compared to popcorn texture.
Better lighting: A flat ceiling reflects light more evenly, which can improve brightness in rooms with limited natural light.
Easier repainting: Smooth surfaces accept primer and paint without the texture shedding or flattening.
Modern finish options: Popcorn ceiling alternatives create a contemporary interior style that fits renovated kitchens, living rooms, and primary suites.
Simplified repairs: A ceiling patch blends more effectively on smooth drywall than on heavy texture.
Popcorn ceiling vs flat ceiling in resale presentation
Popcorn ceiling vs flat ceiling differences often appear during showings and inspections. A flat ceiling looks newer, photographs better, and supports clean trim lines at crown molding and recessed lighting. A popcorn ceiling draws attention to surface irregularity and can complicate future ceiling texture changes.
Popcorn ceiling vs smooth ceiling cost in real projects
Popcorn ceiling vs smooth ceiling cost depends on the selected path:
Removal and smooth finishing: scraping, skim coating, sanding, priming, and painting.
Covering without removal: overlay panels, ceiling planks, or new drywall.
Removal tends to cost less than full ceiling replacement when the substrate is in good condition, while covering can reduce risk in situations where scraping is not the right choice for a specific ceiling.
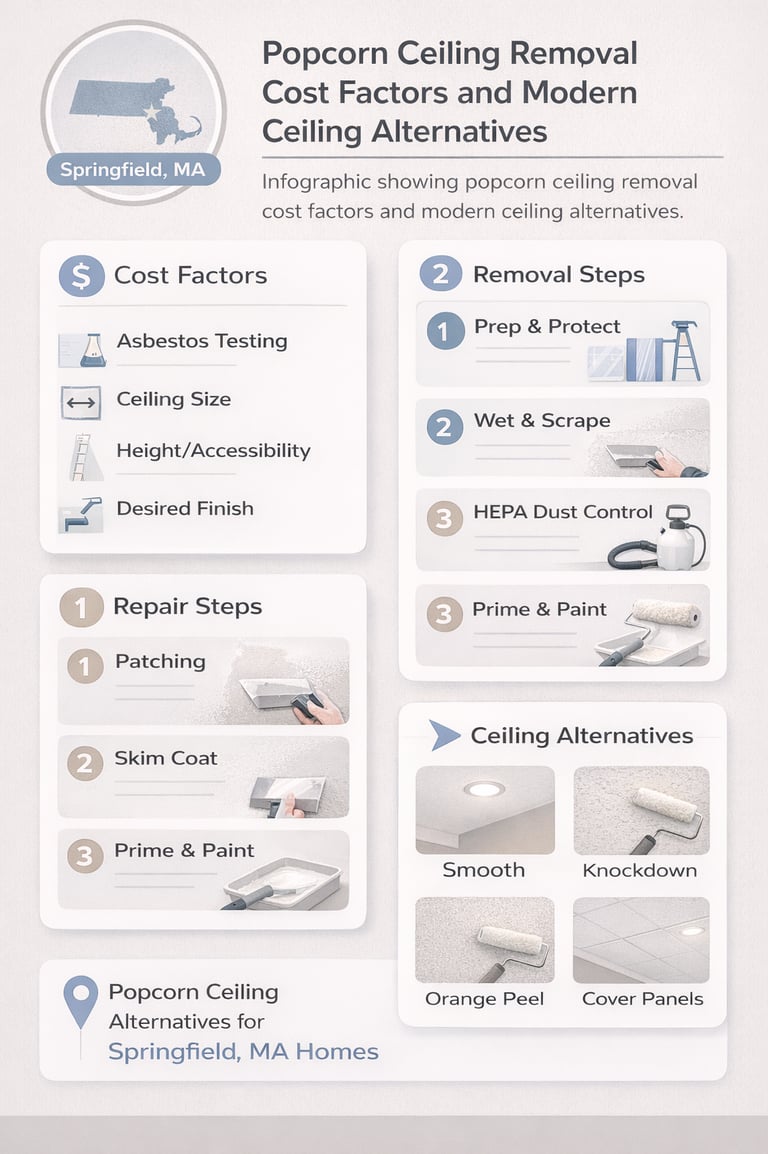
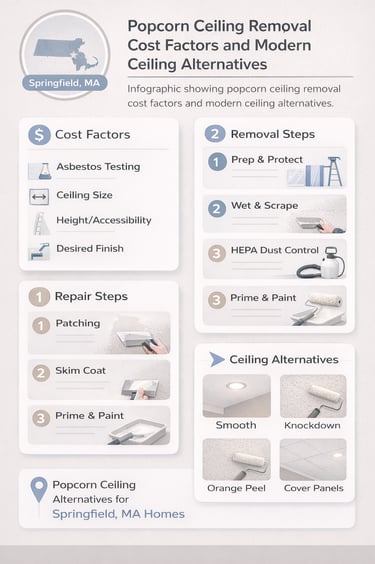
Popcorn ceiling removal cost in Springfield, MA
Popcorn ceiling removal cost is commonly estimated by square footage, ceiling height, painted texture, and the scope of refinishing.
Published national cost ranges commonly fall between $1 and $6 per square foot for removal, while asbestos remediation ranges can rise significantly when asbestos is present. A January 2026 unit-cost estimate for basic removal work starts around $1.84 to $3.46 per square foot, with variation driven by site conditions and options.
Cost to remove popcorn ceiling: key pricing variables
Cost to remove popcorn ceiling changes with these factors:
Painted vs unpainted popcorn texture (painted texture often resists water and scrapes slower)
Ceiling height and access (vaults, stairwells, tight hallways)
Damage history (water staining, tape seam failure, previous patch attempts)
Containment requirements (HVAC protection, full poly containment, negative air setup)
Finish level (basic removal vs Level 5 smooth finish)
Trim and fixture handling (crown molding, ceiling fans, can lights, smoke detectors)
Removing popcorn ceiling and refinishing cost: what “refinish” includes
Removing popcorn ceiling and refinishing cost usually includes multiple line items after the scraping step:
Substrate evaluation and fastener checks
Joint compound skim coat or targeted leveling
Sanding with dust control
Prime coat to lock down porosity
Final ceiling paint
A quote that lists only popcorn removal may exclude the finish work needed for a truly smooth ceiling.
Affordable popcorn removal options without cutting corners
Affordable popcorn removal options focus on scope control rather than skipping critical steps.
Remove popcorn texture in a smaller zone first (primary bedroom, main hallway, living room)
Bundle rooms with similar ceiling height to reduce setup time
Choose a simple smooth finish rather than complex retexture patterns
Schedule work during an unoccupied window to reduce furniture moving labor
Best way to remove popcorn ceiling: a contractor-grade workflow
Best way to remove popcorn ceiling is a process that starts with safety and ends with a paint-ready ceiling surface.
1) Confirm ceiling material and test planning
Older popcorn texture can contain asbestos in some regions and time periods. EPA guidance recommends that sampling and analysis be performed by a trained and accredited asbestos professional because improper sampling can release fibers and increase risk.
Massachusetts asbestos abatement work carries notification and work-practice requirements under state agencies, including lead time requirements before starting asbestos abatement in many cases. OSHA standards regulate asbestos exposure during construction, renovation, repair, and removal work where asbestos is present.
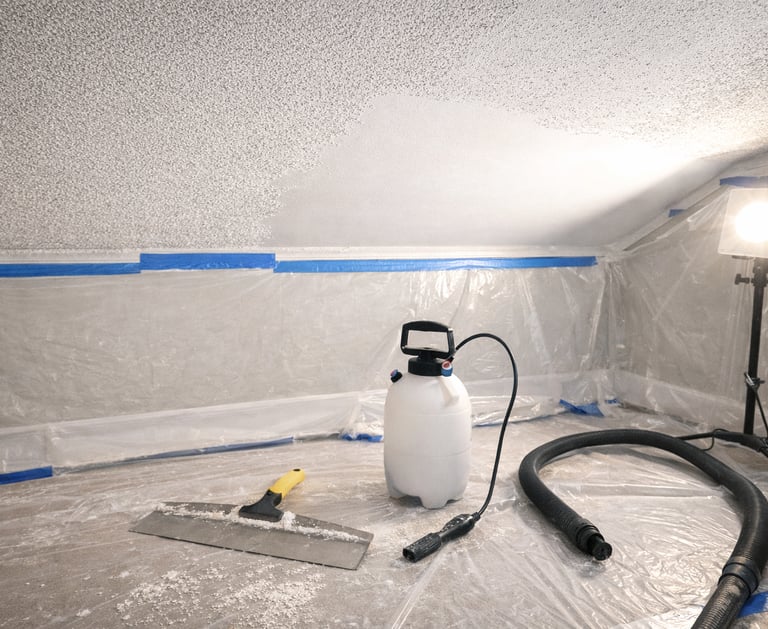
2) How to prep a room for popcorn ceiling removal
How to prep a room for popcorn ceiling removal determines dust levels, cleanup time, and surface protection quality.
Remove or cover furniture with plastic sheeting
Protect floors with rosin paper plus plastic at edges
Tape poly to walls to create a controlled work zone
Cover vents and returns to protect HVAC
Remove light fixtures or protect them with sealed coverings
Establish a debris route to an exterior door for disposal control
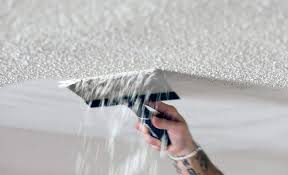
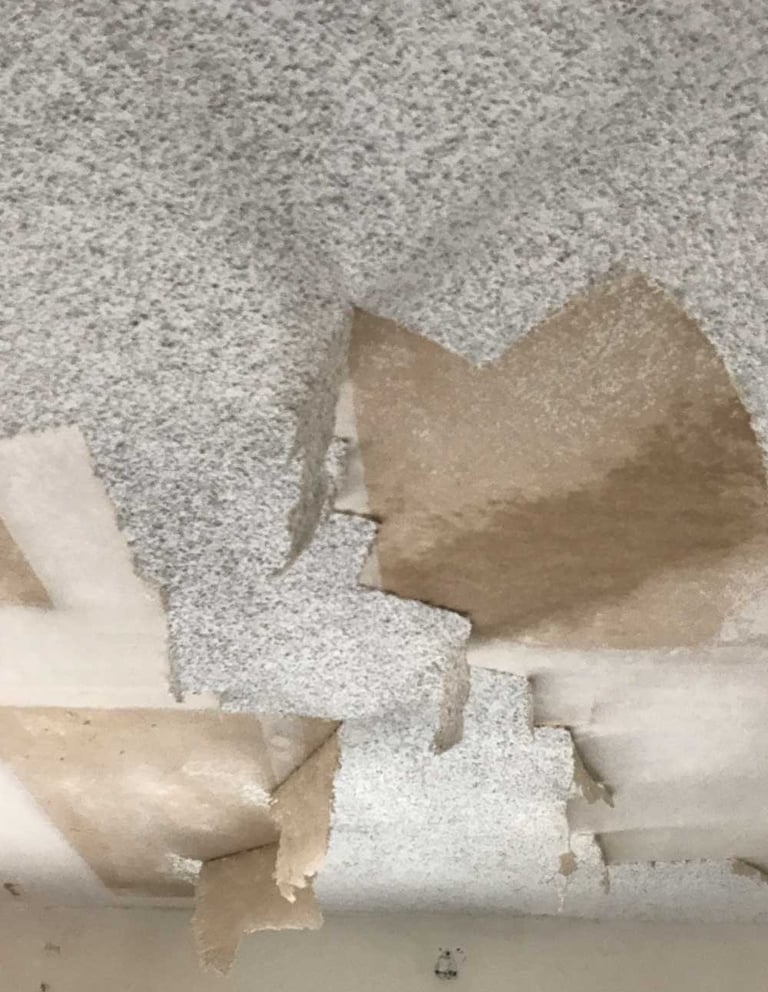
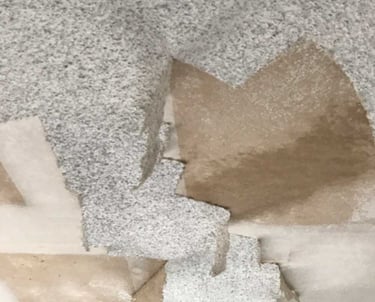
3) Scraping popcorn ceiling with moisture control
Scraping popcorn ceiling texture is often done using a pump sprayer to lightly wet the surface, then using a wide scraper or drywall knife to remove softened material. Painted texture changes the approach because water may not penetrate the paint film. Professional crews typically adjust moisture dwell time, scraper angle, and section size to reduce gouging.
4) Textured ceiling removal cleanup and surface reset
Textured ceiling removal creates debris that spreads easily without containment. A professional popcorn removal service uses controlled bagging, HEPA vacuuming, and systematic wipe-downs. A clean substrate is necessary before any skim coating or primer application.
5) Refinishing for a smooth ceiling
A smooth ceiling typically requires skim coating and sanding to unify the surface. A high-quality result often targets a uniform, low-sheen ceiling paint finish that does not highlight joint lines under directional lighting.
Acoustic ceiling removal: what makes it different?
Acoustic ceiling removal is often used as a general term for popcorn ceiling removal, but it can refer to multiple surfaces:
sprayed acoustic popcorn texture
acoustic ceiling tiles
suspended grid systems
The workflow changes based on the ceiling system. Sprayed popcorn texture focuses on scraping and refinishing. Tile or suspended systems focus on safe removal, substrate repair, and selecting a replacement ceiling finish.
Best tools for removing popcorn ceiling
Best tools for removing popcorn ceiling support speed, surface protection, and dust control.
Pump sprayer with adjustable nozzle
Wide razor scraper or 10–12 inch drywall knife
Corner knife for edges and tight areas
Plastic sheeting (6 mil) and painter’s tape
Drop cloths or rosin paper for floors
HEPA vacuum and disposable bags
Sanding pole with vacuum attachment where possible
Joint compound, skim blades, and trowels for refinishing
Stain-blocking primer for water marks
DIY popcorn ceiling removal tips for Springfield homeowners
DIY popcorn ceiling removal tips work best in small, low-risk areas with easy access and a clear refinishing plan.
Protect floors and walls before spraying water.
Work in 16–25 sq ft sections to control wetness and debris.
Use a wide scraper and maintain a shallow angle to reduce gouging.
Plan for skim coating after popcorn removal, not only repainting.
Stop work and arrange professional guidance when ceiling material age suggests asbestos risk, or when texture becomes powdery and airborne.
DIY work frequently fails at the refinishing stage, since a ceiling that looks “good enough” before paint can show ridges and tape seams after paint dries under bright lighting.
Popcorn ceiling repair in Springfield, MA
Popcorn ceiling repair focuses on matching texture, sealing stains, and making the repair blend into surrounding popcorn texture.
Common causes of popcorn ceiling damage:
water stains from roof leaks or plumbing leaks
ceiling fan movement and vibration
previous electrical work holes
cracks at drywall seams
impact damage during moving or renovations
How to repair a popcorn ceiling with a durable patch
How to repair a popcorn ceiling typically follows this sequence:
Remove loose popcorn texture around the damaged area.
Patch the substrate with setting compound or drywall patch material.
Feather edges to reduce the visible transition.
Prime the patch to control absorption.
Recreate popcorn texture using a texture spray or hopper system matched to the existing ceiling texture.
Prime and paint for color consistency.
Popcorn ceiling patch: blending strategy that avoids a “bullseye”
A popcorn ceiling patch looks best when the repair extends slightly beyond the visible damage, then fades into existing texture. Matching aggregate size and spray pattern matters more than the brand of texture material. Primer selection matters because unprimed patch areas can flash through ceiling paint.
How to clean a popcorn ceiling without breaking the texture
How to clean a popcorn ceiling requires low pressure and a tool that does not tear texture peaks. A common safe approach uses a vacuum with a wide brush attachment and gentle passes to lift dust and cobwebs without crushing the surface.
Popcorn ceiling maintenance plan for long-term appearance
Popcorn ceiling maintenance focuses on preventing stains and minimizing contact damage.
Control moisture in bathrooms and kitchens with exhaust fans
Address roof and plumbing leaks quickly to prevent yellowing
Avoid aggressive scrubbing, since texture can crumble
Keep ceiling fans balanced to reduce vibration-related cracking
Use soft vacuum attachments for periodic dust control
How to paint popcorn ceiling without flattening the texture
How to paint popcorn ceiling requires paint loading control and the correct roller nap. Guidance for textured ceilings commonly recommends a 1/2-inch or 3/4-inch nap roller cover rather than a low-nap roller used for smooth ceilings.
Painting steps that reduce peeling and shedding
Repair loose or damaged popcorn texture before painting.
Spot-prime stains with stain-blocking primer.
Use ceiling paint formulated for low splatter.
Roll gently and maintain a wet edge.
Consider spray application for heavily textured ceilings where roller contact causes shedding.
Painting over popcorn texture can make future popcorn ceiling removal harder, since the paint film can reduce water penetration during scraping.
Popcorn ceiling alternatives for Springfield homeowners
Popcorn ceiling alternatives fit different budgets and timelines.
Best popcorn ceiling alternatives for modern homes
Smooth ceiling finish (skim coat and Level 5 finish)
Knockdown texture (subtle texture that hides minor imperfections)
Orange peel ceiling texture (fine texture, lower visual weight than popcorn)
Skip trowel plaster-style texture (hand-applied character)
Wood planks or beadboard ceiling systems (architectural detail)
New drywall overlay (cover existing texture with new board, then finish)
Popcorn ceiling texture options that keep some texture without popcorn
Popcorn ceiling texture options that modernize the look while keeping texture include knockdown, light orange peel, and sand swirl finishes. These finishes hide minor ceiling defects while avoiding the heavy “acoustic” appearance of popcorn texture.
How to hide popcorn ceiling without removal
How to hide popcorn ceiling can be handled with:
skim coating over the existing texture in select conditions
adding ceiling panels or planks
installing a new layer of drywall and finishing smooth
Covering approaches can reduce mess compared to scraping, yet they change ceiling height and may require trim adjustments.
How to choose a popcorn ceiling removal service in Springfield, Massachusetts
How to choose a popcorn ceiling removal service is a quality-control checklist.
Written estimate that separates popcorn ceiling removal, repairs, and painting
Clear plan for containment, HVAC protection, and daily cleanup
Process for testing and safe handling when asbestos risk is present
Insurance coverage and documented safety practices
Finish standard definition (smooth finish level and paint scope)
Clear timeline for room access, dry times, and return-to-service
Repair capability for water stains, seam cracks, and nail pops
A professional popcorn removal service should describe the entire system, not only scraping.
Popcorn removal service expectations in occupied Springfield homes
Popcorn removal is invasive work without a containment plan. A professional approach typically sets expectations on:
daily work hours and noise
dust barriers and floor protection
fixture handling and reinstallation
waste removal and disposal
final walk-through under strong lighting to confirm finish quality
Popcorn ceiling installation guide for reference and renovation planning
Popcorn ceiling installation guide information helps homeowners understand what was applied overhead and why removal requires more than scraping.
A basic installation sequence historically used:
Drywall installation and taped seams
Base primer or sealer coat
Sprayed popcorn texture application using a hopper and air compressor
Dry time and optional paint coat
Modern construction trends favor smooth ceilings or light textures, since they support cleaner lighting, simpler maintenance, and easier future renovation.
Quick comparisons for Springfield projects
The table below summarizes practical decision points that drive popcorn ceiling removal outcomes in local homes.
Goal: Best-fit approach. Why it fits: Smooth, modern popcorn ceiling removal + skim coating over. Removes popcorn texture and creates a uniform ceiling surface. Lower mess profile compared to scraping. Cover or skim coat alternatives. Reduce scraping debris and wet texture cleanup. Restore a damaged textured ceiling, popcorn ceiling repair + popcorn ceiling patch must match the existing ceiling texture. Painting the popcorn ceiling without removal. Updates color while preserving the texture profile.
FAQ for popcorn ceiling removal and popcorn ceiling repair in Springfield, MA
What is popcorn ceiling removal?
Popcorn ceiling removal is the process of removing popcorn texture from a ceiling, then repairing and refinishing the substrate for paint. The work typically includes room protection, scraping, cleanup, skim coating, sanding, priming, and ceiling painting.
What is the best way to remove popcorn ceiling?
The best way to remove popcorn ceiling uses containment, controlled wetting, careful scraping, and a planned refinishing step. Testing and safe handling procedures are crucial in older homes where asbestos risk is present.
How much does it cost to remove a popcorn ceiling?
Popcorn ceiling removal cost commonly ranges from $1 to $6 per square foot, with variation driven by ceiling height, painted texture, and finish scope. A January 2026 unit-cost estimate starts around $1.84 to $3.46 per square foot for basic removal work.
What is the difference between popcorn removal cost and removing popcorn ceiling and refinishing cost?
Popcorn removal cost can refer to scraping only. Removing popcorn ceiling and refinishing cost includes skim coating, sanding, priming, and painting to deliver a smooth, finished ceiling.
How do you clean a popcorn ceiling?
Clean a popcorn ceiling by using a vacuum with a wide brush attachment and gentle passes to lift dust and cobwebs without damaging the texture. Avoid soaking the surface with water.
How do you paint a popcorn ceiling?
Paint popcorn ceiling using a 1/2-inch or 3/4-inch nap roller for textured ceilings, maintain light pressure, and keep a wet edge. Spot-prime stains first, then apply ceiling paint in consistent sections.
What are affordable popcorn removal options for a tight renovation budget?
Affordable popcorn removal options include removing texture room-by-room, bundling similar rooms to reduce setup, selecting a standard smooth finish, and aligning the project with other interior work to reduce mobilization cost.
What should a homeowner expect from popcorn ceiling repair?
Popcorn ceiling repair should include substrate patching, texture matching, stain-blocking primer, and paint blending. The repair should disappear at normal viewing height under typical room lighting.
Popcorn ceiling removal and repair contractor service area around Springfield, Massachusetts
A Springfield-based contractor typically serves homeowners across Hampden County and nearby communities such as West Springfield, Agawam, Chicopee, Holyoke, Ludlow, Longmeadow, East Longmeadow, Wilbraham, and Enfield, Connecticut, by request. Project planning starts with ceiling evaluation, a clear scope, and a written estimate that covers popcorn ceiling removal, popcorn ceiling repair, and final painting.
For homeowners seeking a clean upgrade, popcorn ceiling removal paired with a smooth ceiling finish remains one of the fastest ways to modernize interiors in Springfield, Massachusetts.
FAQs
Is scraping safe?
If your popcorn ceiling was installed before 1980, test for asbestos first. If after 1980 yes as long as you wear a regular dust mask. Apply plenty of water to prevent dust.
Do I need special tools?
A wide putty knife, a pump spray bottle, and drop cloths and plastic are essential for the job. A ladder or something to stand on helps. Painting tools to prime and paint after removal. A bucket of joint compound to repair any defects.
How long does it take?
Scraping a standard room usually takes a few hours, depending on the ceiling size and the thickness of the texture. The repairs after removing the texture take longer due to the drying time between coats.
Should I wet the ceiling?
Yes, using a pump sprayer like the ones used for gardening works. It helps soften the texture for easier removal and prevents dust. I usually wet the ceiling twice, about 5 minutes apart, to get it soaked in.
Can I paint afterward?
Absolutely, once smooth and dry, you can. Just make sure to prime with an oil-based Kilz primer for the best paint adhesion.
What cleanup tips do you recommend?
Use drop cloths to catch the texture, mask furniture with painter's plastic. Vacuum thoroughly, and seal debris in bags to keep your space tidy.